
ETABS টিউটোরিয়াল: নতুন বিল্ডিং মডেল তৈরি — সম্পূর্ণ স্টেপ-বাই-স্টেপ গাইড (স্ক্রিনশটসহ)
সিভিল ইঞ্জিনিয়ারিং পড়ছেন এবং ETABS সফটওয়্যার নিয়ে কাজ শুরু করতে চাইছেন? তাহলে এই গাইডটি আপনার জন্যই তৈরি করা হয়েছে। ETABS হলো বিশ্বব্যাপী স্বীকৃত একটি স্ট্রাকচারাল অ্যানালাইসিস ও ডিজাইন সফটওয়্যার, যা মূলত বিল্ডিং স্ট্রাকচার ডিজাইনের জন্য ব্যবহৃত হয়। ETABS-এর পূর্ণরূপ হলো Extended Three dimensional Analysis of Building Systems। বহুতল ভবনের কাঠামোগত বিশ্লেষণ, বিম-কলাম-স্ল্যাব-শিয়ার ওয়ালের ডিজাইন, লোড ক্যালকুলেশন (Dead Load, Live Load, Wind Load, Seismic Load), কংক্রিট ও স্টিল স্ট্রাকচারের ডিজাইন কোড অনুযায়ী চেক (যেমন ACI, AISC, Eurocode), এবং ভূমিকম্প-প্রতিরোধী ডিজাইনের মতো গুরুত্বপূর্ণ কাজে ETABS ব্যবহার করা হয়।
কিন্তু নতুন যারা এই সফটওয়্যার শিখছেন, তাদের কাছে শুরুতে ইন্টারফেসটাই কঠিন মনে হয় — কোথায় ক্লিক করতে হবে, কোন সেটিংস কী কাজ করে, ম্যাটেরিয়াল প্রপার্টি কীভাবে ঠিকভাবে সেট করতে হয় — এই সবকিছু বইয়ের লেখা পড়ে বোঝা সহজ নয়। এই সমস্যার সমাধানেই তৈরি করা হয়েছে এই PDF গাইডটি, যেখানে প্রতিটি ধাপ real screenshot এবং হাতে আঁকা arrow/মার্কিং দিয়ে স্পষ্টভাবে দেখানো হয়েছে, যাতে আপনি সফটওয়্যার খুলে পাশাপাশি দেখে দেখে নিজে নিজেই কাজটি করতে পারেন।
এই গাইডে যা যা ধাপে ধাপে দেখানো হয়েছে:
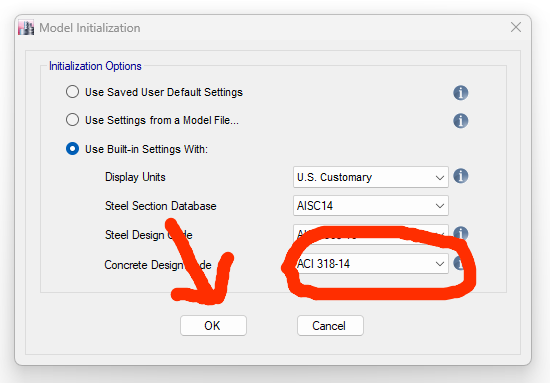
১. মডেল ইনিশিয়ালাইজেশন ও সফটওয়্যার সেটআপ — ETABS Version 17 প্রথমবার খোলার পর কীভাবে ইউনিট সিস্টেম (U.S. Customary), স্টিল সেকশন ডাটাবেজ (AISC14), স্টিল ডিজাইন কোড (AISC 360-16) এবং কংক্রিট ডিজাইন কোড (ACI 318-14) সঠিকভাবে সিলেক্ট করতে হয়, তা দেখানো আছে।
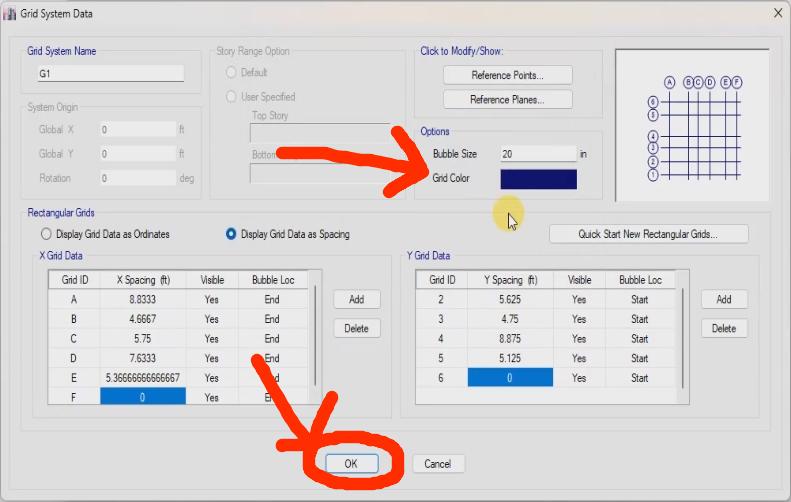
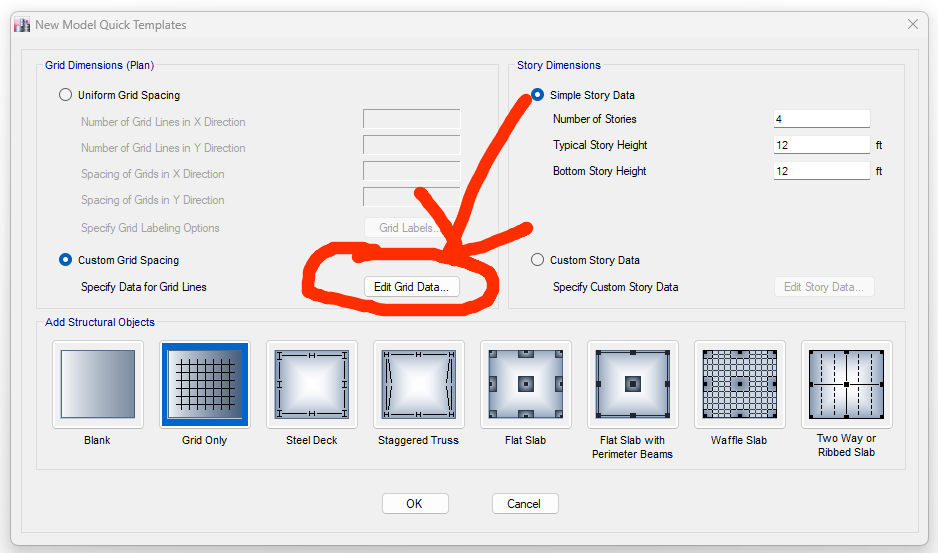
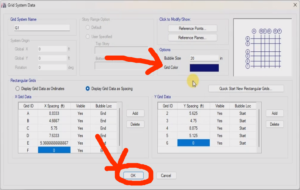
২. গ্রিড সিস্টেম তৈরি ও কাস্টমাইজেশন — কীভাবে কাস্টম গ্রিড স্পেসিং সেট করা যায় (X ও Y ডিরেকশনে ভিন্ন ভিন্ন স্প্যান দিয়ে), গ্রিড আইডি, বাবল সাইজ এবং গ্রিড কালার কীভাবে পরিবর্তন করা যায় তা বিস্তারিত দেখানো হয়েছে। বাস্তব প্রজেক্টে সাধারণত সব গ্রিড স্প্যান সমান হয় না — এই গাইডে সেই বাস্তবসম্মত পরিস্থিতি অনুযায়ী কাস্টম গ্রিড ডাটা এন্ট্রি দেখানো হয়েছে।
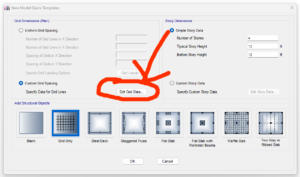
৩. স্টোরি ডাটা সেটআপ — একাধিক তলা (Story), ফাউন্ডেশন লেভেল ও তাদের উচ্চতা কীভাবে টেবিল আকারে ইনপুট দিতে হয়, “Similar To” অপশন ব্যবহার করে কীভাবে সময় বাঁচানো যায়, তা দেখানো হয়েছে।
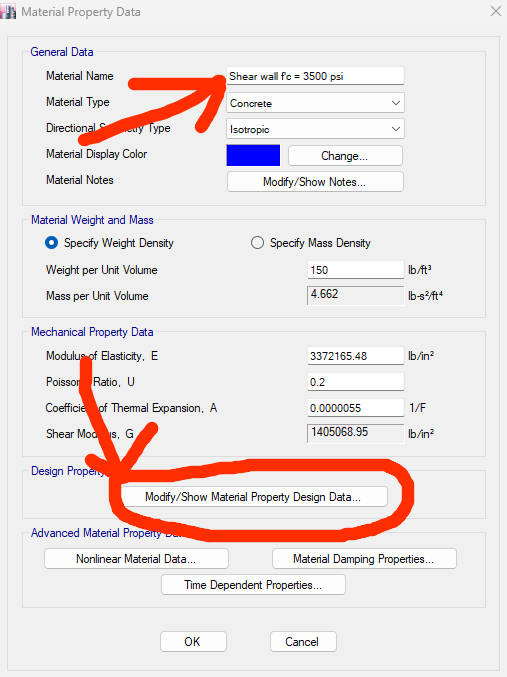
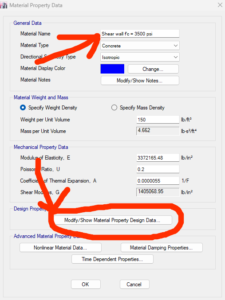
৪. কংক্রিট ম্যাটেরিয়াল প্রপার্টি ডিফাইন করা — এখানে একটি গুরুত্বপূর্ণ দিক হলো, বাস্তব ডিজাইনে বিম, স্ল্যাব, কলাম এবং শিয়ার ওয়ালের জন্য আলাদা আলাদা কংক্রিট গ্রেড ব্যবহার করা হয় (যেমন Beam ও Slab-এর জন্য f’c = 3000 psi, আর Column ও Shear Wall-এর জন্য f’c = 3500 psi)। এই গাইডে দেখানো হয়েছে কীভাবে:
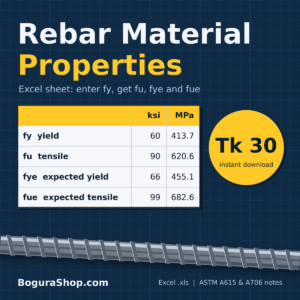
৫. রিবার (Reinforcement) ম্যাটেরিয়াল ডিফাইন করা — Main Rebar (fy = 60 ksi) এবং Stirrup (fy = 40 ksi) কীভাবে আলাদা আলাদা ম্যাটেরিয়াল হিসেবে ডিফাইন করতে হয়, Modulus of Elasticity (29000000 psi অনুযায়ী প্রমিত মান), Minimum ও Expected Yield/Tensile Strength কীভাবে ইনপুট দিতে হয় — এসবই দেখানো হয়েছে, সাথে রেফারেন্স টেবিল (Determination of Rebar Properties from fy) সহ যাতে ব্যবহারকারী নিজে থেকেই সঠিক মান বের করতে পারেন।
৬. কলাম সেকশন তৈরি ও লাইব্রেরি সাজানো — এই অংশে দেখানো হয়েছে কীভাবে Rectangular Concrete Column সেকশন তৈরি করতে হয়, Regular Column Shutter Size অনুযায়ী (১২”x১২” থেকে ১৫”x৪০” পর্যন্ত) একাধিক সাইজের কলাম দ্রুত তৈরি করা যায় “Add Copy of Property” ফিচার ব্যবহার করে, প্রতিটির জন্য আলাদা ডিসপ্লে কালার সেট করে সহজে চেনার ব্যবস্থা, স্টিফনেস মডিফায়ার (Moment of Inertia = 0.7, ক্র্যাকড সেকশন অনুযায়ী) সেট করার কারণ ও পদ্ধতি, এবং সবশেষে Reinforcement Data-তে Longitudinal Bar, Confinement Bar, Clear Cover ইত্যাদি ইনপুট দিয়ে সম্পূর্ণ ডিজাইন-রেডি কলাম সেকশন তৈরি করা।
৭. বিম সেকশন তৈরি করা — Grade Beam ও Floor Beam-এর জন্য প্রমিত সাইজ টেবিল অনুযায়ী (যেমন 12″x15″, 12″x22″ ইত্যাদি) একাধিক বিম সেকশন তৈরি, M3 Design Only (Beam) টাইপ সিলেক্ট করা, Torsional Constant ও Moment of Inertia-এর জন্য উপযুক্ত স্টিফনেস মডিফায়ার (0.35) সেট করা, এবং Cover to Rebar Group Centroid ইনপুট দেওয়া দেখানো হয়েছে।
৮. স্ল্যাব প্রপার্টি সেটআপ — Membrane ও Shell টাইপ মডেলিং, স্ল্যাব থিকনেস ইনপুট, এবং Bending Modifier (0.0001) ব্যবহার করে কীভাবে One-Way স্ল্যাব বিহেভিয়ার সিমুলেট করা যায় তা দেখানো হয়েছে।
৯. শিয়ার ওয়াল প্রপার্টি সেটআপ — Shell-Thin মডেলিং টাইপ, ওয়াল থিকনেস, এবং ইন-প্লেন স্টিফনেস মডিফায়ার (0.7) কীভাবে সেট করতে হয় তা দেখানো হয়েছে।
কেন এই গাইডটি আলাদা:
মার্কেটে ETABS নিয়ে অনেক ভিডিও টিউটোরিয়াল থাকলেও, সেগুলো দেখে নিজে করার সময় বারবার পজ-প্লে করতে হয়, নির্দিষ্ট স্টেপ খুঁজে পেতে সময় লাগে। এই PDF গাইডে প্রতিটি ধাপ স্ক্রিনশট ও হাতে আঁকা নির্দেশনা (arrow, circle মার্কিং) দিয়ে এমনভাবে সাজানো হয়েছে যে আপনি প্রয়োজন মতো যেকোনো স্টেপে সরাসরি চোখ বুলিয়ে দেখে নিতে পারবেন — বারবার ভিডিও রিওয়াইন্ড করার ঝামেলা নেই। সাথে বাস্তব প্রজেক্টে ব্যবহৃত রেফারেন্স টেবিল (Column Shutter Size, Beam Size, Concrete Grade Conversion, Rebar Properties) যুক্ত থাকায় এটি শুধু একটি “কীভাবে করবেন” গাইড নয়, বরং একটি প্র্যাকটিক্যাল রেফারেন্স ডকুমেন্টও।
এই গাইড কাদের জন্য উপযোগী:
ফাইল ফরম্যাট: PDF (ডাউনলোডযোগ্য, মোবাইল ও কম্পিউটার উভয়েই সহজে পড়া যায়)
এই গাইড অনুসরণ করে আপনি নিজে ETABS খুলে ধাপে ধাপে একটি সম্পূর্ণ বিল্ডিং মডেলের ভিত্তি (Grid, Story, Material, Section Properties) তৈরি করতে পারবেন, যা যেকোনো স্ট্রাকচারাল ডিজাইন প্রজেক্টের প্রথম ও সবচেয়ে গুরুত্বপূর্ণ ধাপ।
ETABS Tutorial: Creating a New Building Model — Complete Step-by-Step Guide (With Screenshots)
Are you studying civil engineering and looking to get started with ETABS software? This guide was built exactly for that. ETABS is a globally recognized structural analysis and design software, used primarily for building structure design. ETABS stands for Extended Three dimensional Analysis of Building Systems. It’s used for structural analysis of multi-story buildings, design of beams, columns, slabs, and shear walls, load calculations (Dead Load, Live Load, Wind Load, Seismic/Earthquake Load), code-based checks for concrete and steel structures (such as ACI, AISC, Eurocode), and seismic-resistant design.
But for those just starting out, the interface itself can feel overwhelming — where to click, what each setting does, how to correctly set up material properties — none of this is easy to understand just from reading a textbook. This PDF guide was created to solve exactly that problem. Every step is shown with real screenshots and hand-drawn arrows/markings, so you can open the software side by side and follow along to complete the work yourself.
What this guide covers, step by step:
Why this guide is different:
There are plenty of video tutorials on ETABS out there, but following along with them means constantly pausing and rewinding to find the exact step you need — which takes time. This PDF guide lays out every step with screenshots and hand-drawn markings (arrows, circles) so you can jump straight to any step you need without scrubbing through video. It also includes practical reference tables used in real projects (Column Shutter Size, Beam Size, Concrete Grade Conversion, Rebar Properties), making it not just a “how-to” guide but a practical reference document as well.
Who this guide is for:
File format: PDF (downloadable, easy to read on both mobile and computer)
By following this guide, you’ll be able to open ETABS yourself and build, step by step, the foundation of a complete building model (Grid, Story, Material, and Section Properties) — the first and most important step of any structural design project.
Based on 0 Reviews






Product reviews
No reviews yet.